
If LeadCMS is blocking your image upload because it exceeds the 500KB limit, you're in the right place. This guide shows you how to upload, resize, and optimize images directly in LeadCMS so you can stay under the limit without sacrificing quality.
As a content editor, you can directly impact your website's performance. While you might focus on crafting compelling copy and engaging layouts, there's one crucial detail that can dramatically affect your visitors' experience: image file sizes.
In LeadCMS, we enforce a 500 KB limit for standard image formats (JPEG, PNG, WebP, AVIF). This isn't arbitrary - it's based on performance testing to help ensure your content loads quickly for all visitors. The good news: with the latest Media Library features, you can handle the full workflow (upload -> verify -> resize -> optimize) without leaving LeadCMS.
Quick Fix: Upload and Optimize in LeadCMS (Fastest)
Need to upload your image immediately? Here are the fastest options using the built-in media tools:
Enable Media Optimisation in Settings (1 minute)
- Go to Settings → Media
- Confirm Maximum File Size (KB) matches your policy (for example, 500)
- Turn on Auto-Optimise on Upload
- Set Maximum Dimensions (for example, 1024×1024)
- Choose a target Format (AVIF is a strong default) and a quality level
- Save settings

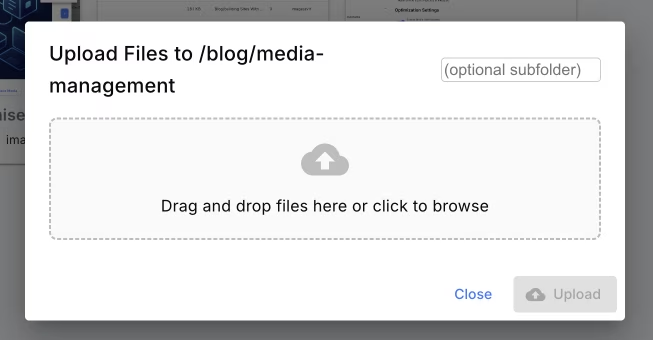
Upload Your Image (Drag, Drop, Done)
- Open the Media Library
- Click Upload (or drag-and-drop files)
- Choose an optional subfolder to keep assets organized
- Upload your file(s)
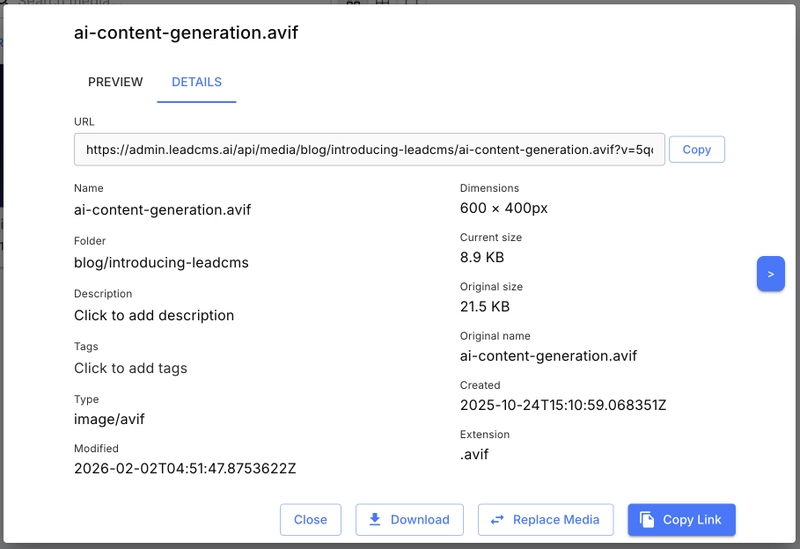
Verify Size and Dimensions in Media Details
- Click the uploaded image to open Media Preview
- Go to the Details tab
- Check Current size and Dimensions
- If it's still too large, use Resize and/or Optimize (next steps)
Still having issues? Read the full guide below to understand best practices, the Media Library workflow, and how to fix existing images at scale.
Why File Size Matters More Than You Think
The Real Impact on Your Visitors
When someone visits your page on a mobile device over a 3G connection, every kilobyte counts:
Large Images (2-5 MB each)
Page loads in 15-30 seconds. Most visitors abandon your site before seeing your content.
Optimized Images (300-500 KB each)
Page loads in 2-4 seconds. Visitors stay engaged and read your content.
Search Engine Rankings
Search engines favor fast sites because user behavior improves dramatically with better speed. When pages load quickly, users:
- Stay longer on the site (lower bounce rates)
- Click through more pages (higher engagement)
- Complete more actions (better conversion signals)
- Return more frequently (improved user loyalty)
These positive user behavior signals tell search engines your site provides value, leading to higher rankings.
Mobile Experience
Over 60% of web traffic comes from mobile devices. Large images cause:
- Slow loading on cellular connections
- Data overage charges for users with limited plans
- Battery drain from processing large files
- Poor user experience leading to high bounce rates
The Flexibility Advantage
You might wonder: "Why can't LeadCMS just handle this automatically?" Now it can.
LeadCMS supports both:
- Automatic optimisation on upload (set it once in Settings)
- Manual optimisation from the Media Preview tools (useful for exceptions)
This keeps editors in control while still making performance the default.
Every Image is Different
Different types of images respond better to different optimization techniques:
- AVIF format typically delivers the smallest files with strong quality
- WebP format is also highly efficient and widely supported
- Photographs usually compress well at moderate quality settings
- Graphics with transparency may require careful choices depending on how they're used
Your Creative Vision Matters
As a content editor, you understand your images better than any automated system:
- Which details are important to preserve
- What quality level maintains your brand standards
- Whether an image serves as decoration or critical information
- How the image fits within your overall content strategy
The Designer vs Developer Dilemma (And Why You're the Solution)
If you've worked with development teams, you've probably seen this classic debate:
Designer: "This image looks terrible at 70% quality. Look at these compression artifacts around the text. Our brand standards require crisp, high-quality visuals."
Developer: "But it's 2.3 MB. The page takes 15 seconds to load on mobile. Nobody will wait that long to see your beautiful image."
Both are right - and both are missing the bigger picture.
The Reality Check
Here's what we've learned from real-world testing: a visitor who never sees your page can't appreciate your beautiful imagery. The most perfectly crafted, pixel-perfect image is worthless if it causes visitors to abandon your site before it loads.
Consider this scenario:
- Version A: Stunning 3 MB hero image, loads in 25 seconds on 3G
- Version B: Well-optimized 400 KB hero image, loads in 3 seconds on 3G
Version A might win in a side-by-side quality comparison, but Version B wins where it matters most: real user engagement.
The Sweet Spot: 500 KB and Under
Through extensive testing across different networks and devices, we've found that images under 500 KB consistently perform well on most connections.
This isn't an arbitrary number. It's based on real-world network performance data. A 500 KB image typically loads quickly on standard mobile connections, keeping visitors engaged while preserving visual quality.
Finding Your Golden Middle
The art of image optimization isn't about choosing between "beautiful" and "functional" - it's about finding the golden middle where:
- ✅ Quality is good enough that visitors trust your brand
- ✅ File size is small enough that visitors actually see your content
- ✅ Loading speed is fast enough that visitors stay engaged
Practical Guidelines for the Golden Middle
- Start with 500 KB as your ceiling, not your floor
- Smaller is always better - aim for 300-400 KB when possible
- Resize to the dimensions you actually need
- Verify results in Media Details before using the image in important sections
Practical Optimization Guidelines
Choose the Right Format
- AVIF: Best compression and great quality for most web images
- WebP: Excellent compression and wide modern browser support
- JPEG: Use when you specifically need it for compatibility or workflows
- PNG: Use for transparency or when lossless quality is required
Quality Settings That Work
For most content images:
- Hero images, product photos: 80-90% quality
- Blog post images, thumbnails: 70-80% quality
- Background images, decorative elements: 60-70% quality
Size Recommendations
Before uploading (or after upload via Resize), keep dimensions aligned with how the image will display:
- Blog post images: 800-1200px wide
- Thumbnails: 300-400px wide
- Hero images: 1200-1600px wide
- Background images: 1200-1920px wide
Don't ship a 4000px wide image if it will display at 800px.
Step-by-Step Optimization Workflow
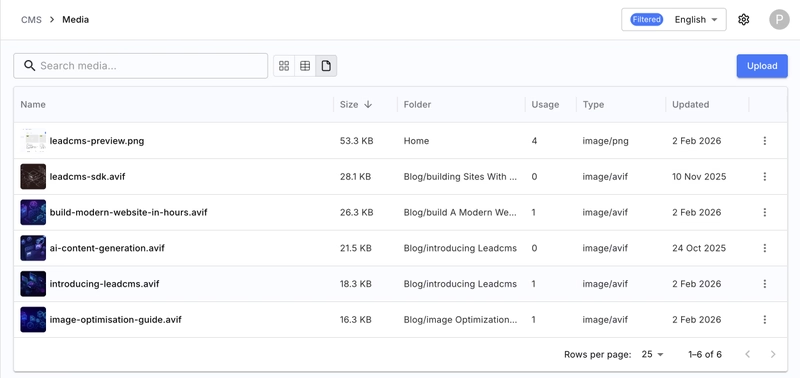
Step 1: Upload and Keep Media Organized
Use the Media Library to upload images and keep folders tidy. The list view makes it easier to spot large outliers and keep performance consistent as the site grows.
Step 2: Verify in Details (Before You Publish)
Open the media item and review it in the Details tab:
- Current size (what your site will serve)
- Original size (what was uploaded)
- Dimensions
- URL for use in your content/front-end
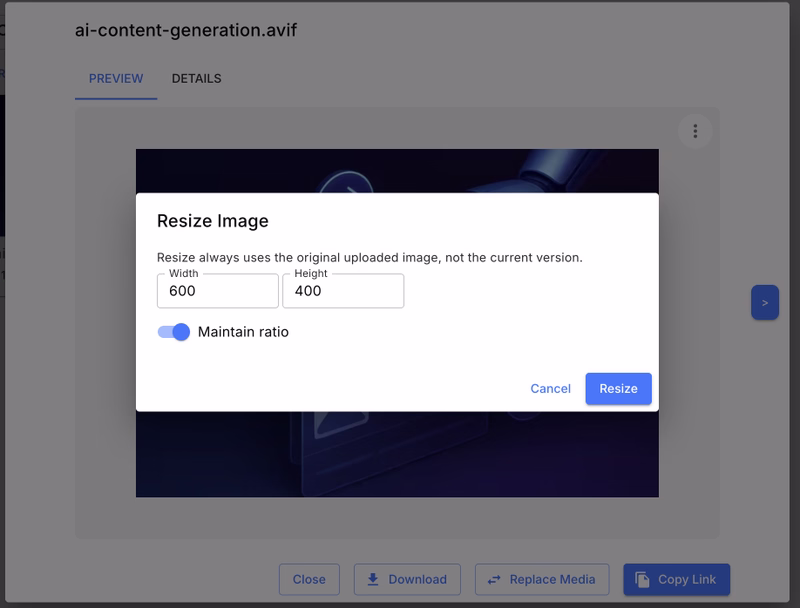
Step 3: Resize in LeadCMS (No Re-export Needed)
If the image is too large in dimensions, resize it directly in the Media Preview tools. Resizing is often the fastest way to reduce file size.
Step 4: Optimize Existing Images (One-Click)
If you have older images, or you changed your preferred format/quality/dimensions in settings, you can apply your current optimisation rules to existing media.
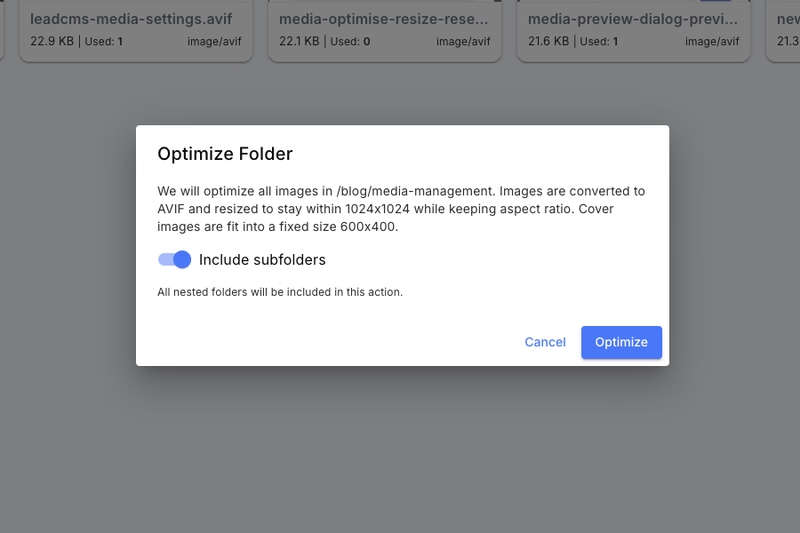
Step 5: Optimize or Reset a Whole Folder (Optional)
For large sites, you can apply optimisation across a folder (and optionally include subfolders). This helps you apply new settings across a section of the site.
The Bottom Line
A well-optimized image that loads quickly will consistently outperform a perfect image that causes visitors to abandon your page. In LeadCMS, the 500 KB limit isn't a restriction - it's a performance guardrail supported by a media workflow that lets you upload, verify, resize, and optimize images right where you publish.
Following this guide helps eliminate "file too large" errors and keeps your website consistently fast. Upload images through the Media Library, verify in Details, then resize/optimize as needed.
Frequently Asked Questions
Keep your Media settings consistent (format, max dimensions, quality). When you change them, use folder optimisation to apply the new rules across a section of the site.